
Student How-To Guides: Presenting in Zoom

Nov 16, 2020
By:  Autumn Jager
How-To Guides: Presenting in Zoom
Presentations can be stressful, and presentations over Zoom take it to another level. If you are taking an online course that meets synchronously (there are designated meeting times via a video conference platform like Zoom), you may be required to give a presentation. With a little practice and this guide, it can be an easy, stress-free experience. This guide walks through starting the screen share, options, and presenter controls in Zoom.
Sharing Your Screen
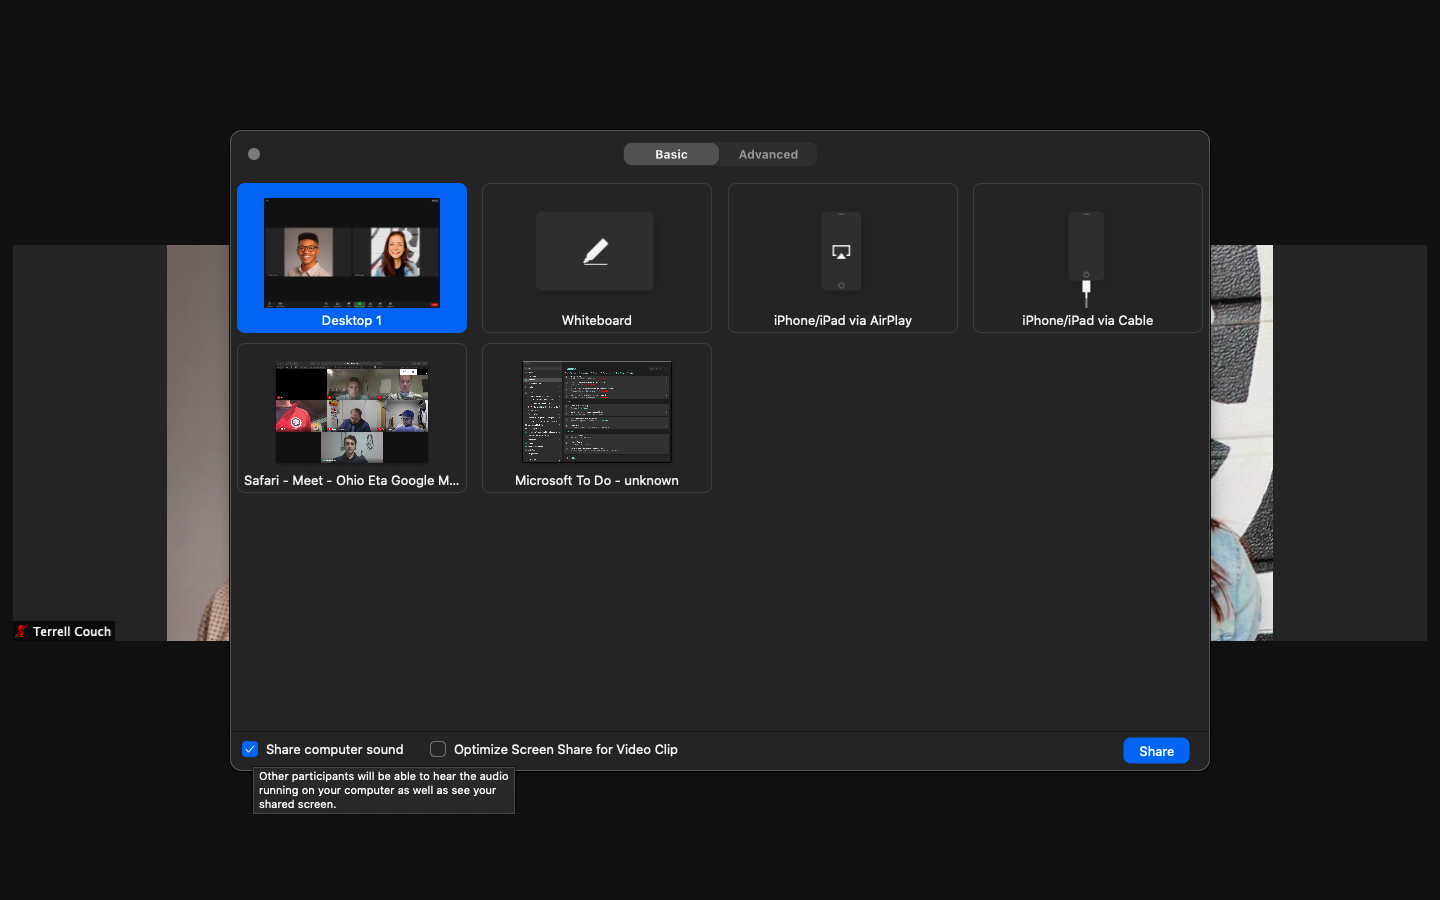
To begin presenting over Zoom, click the Share Screen button at the bottom of your screen. This will bring up several options for ways to share your screen:
- Desktop 1 - This allows you to share something that’s saved on your computer.
- Whiteboard - This allows you to share a blank screen that you can write or draw on
- iPhone/iPad via AirPlay or Cable - Selecting this option will allow you to share the display of your iPhone or iPad using one of these methods.
- Internet Browser - Selecting this option allows you to share your internet browser tabs.
If you are utilizing any videos, make sure to click the Share Computer Sound button at the bottom of the pop-up box. Once you’ve selected the appropriate screen-sharing option, click the blue Share button at the bottom right.
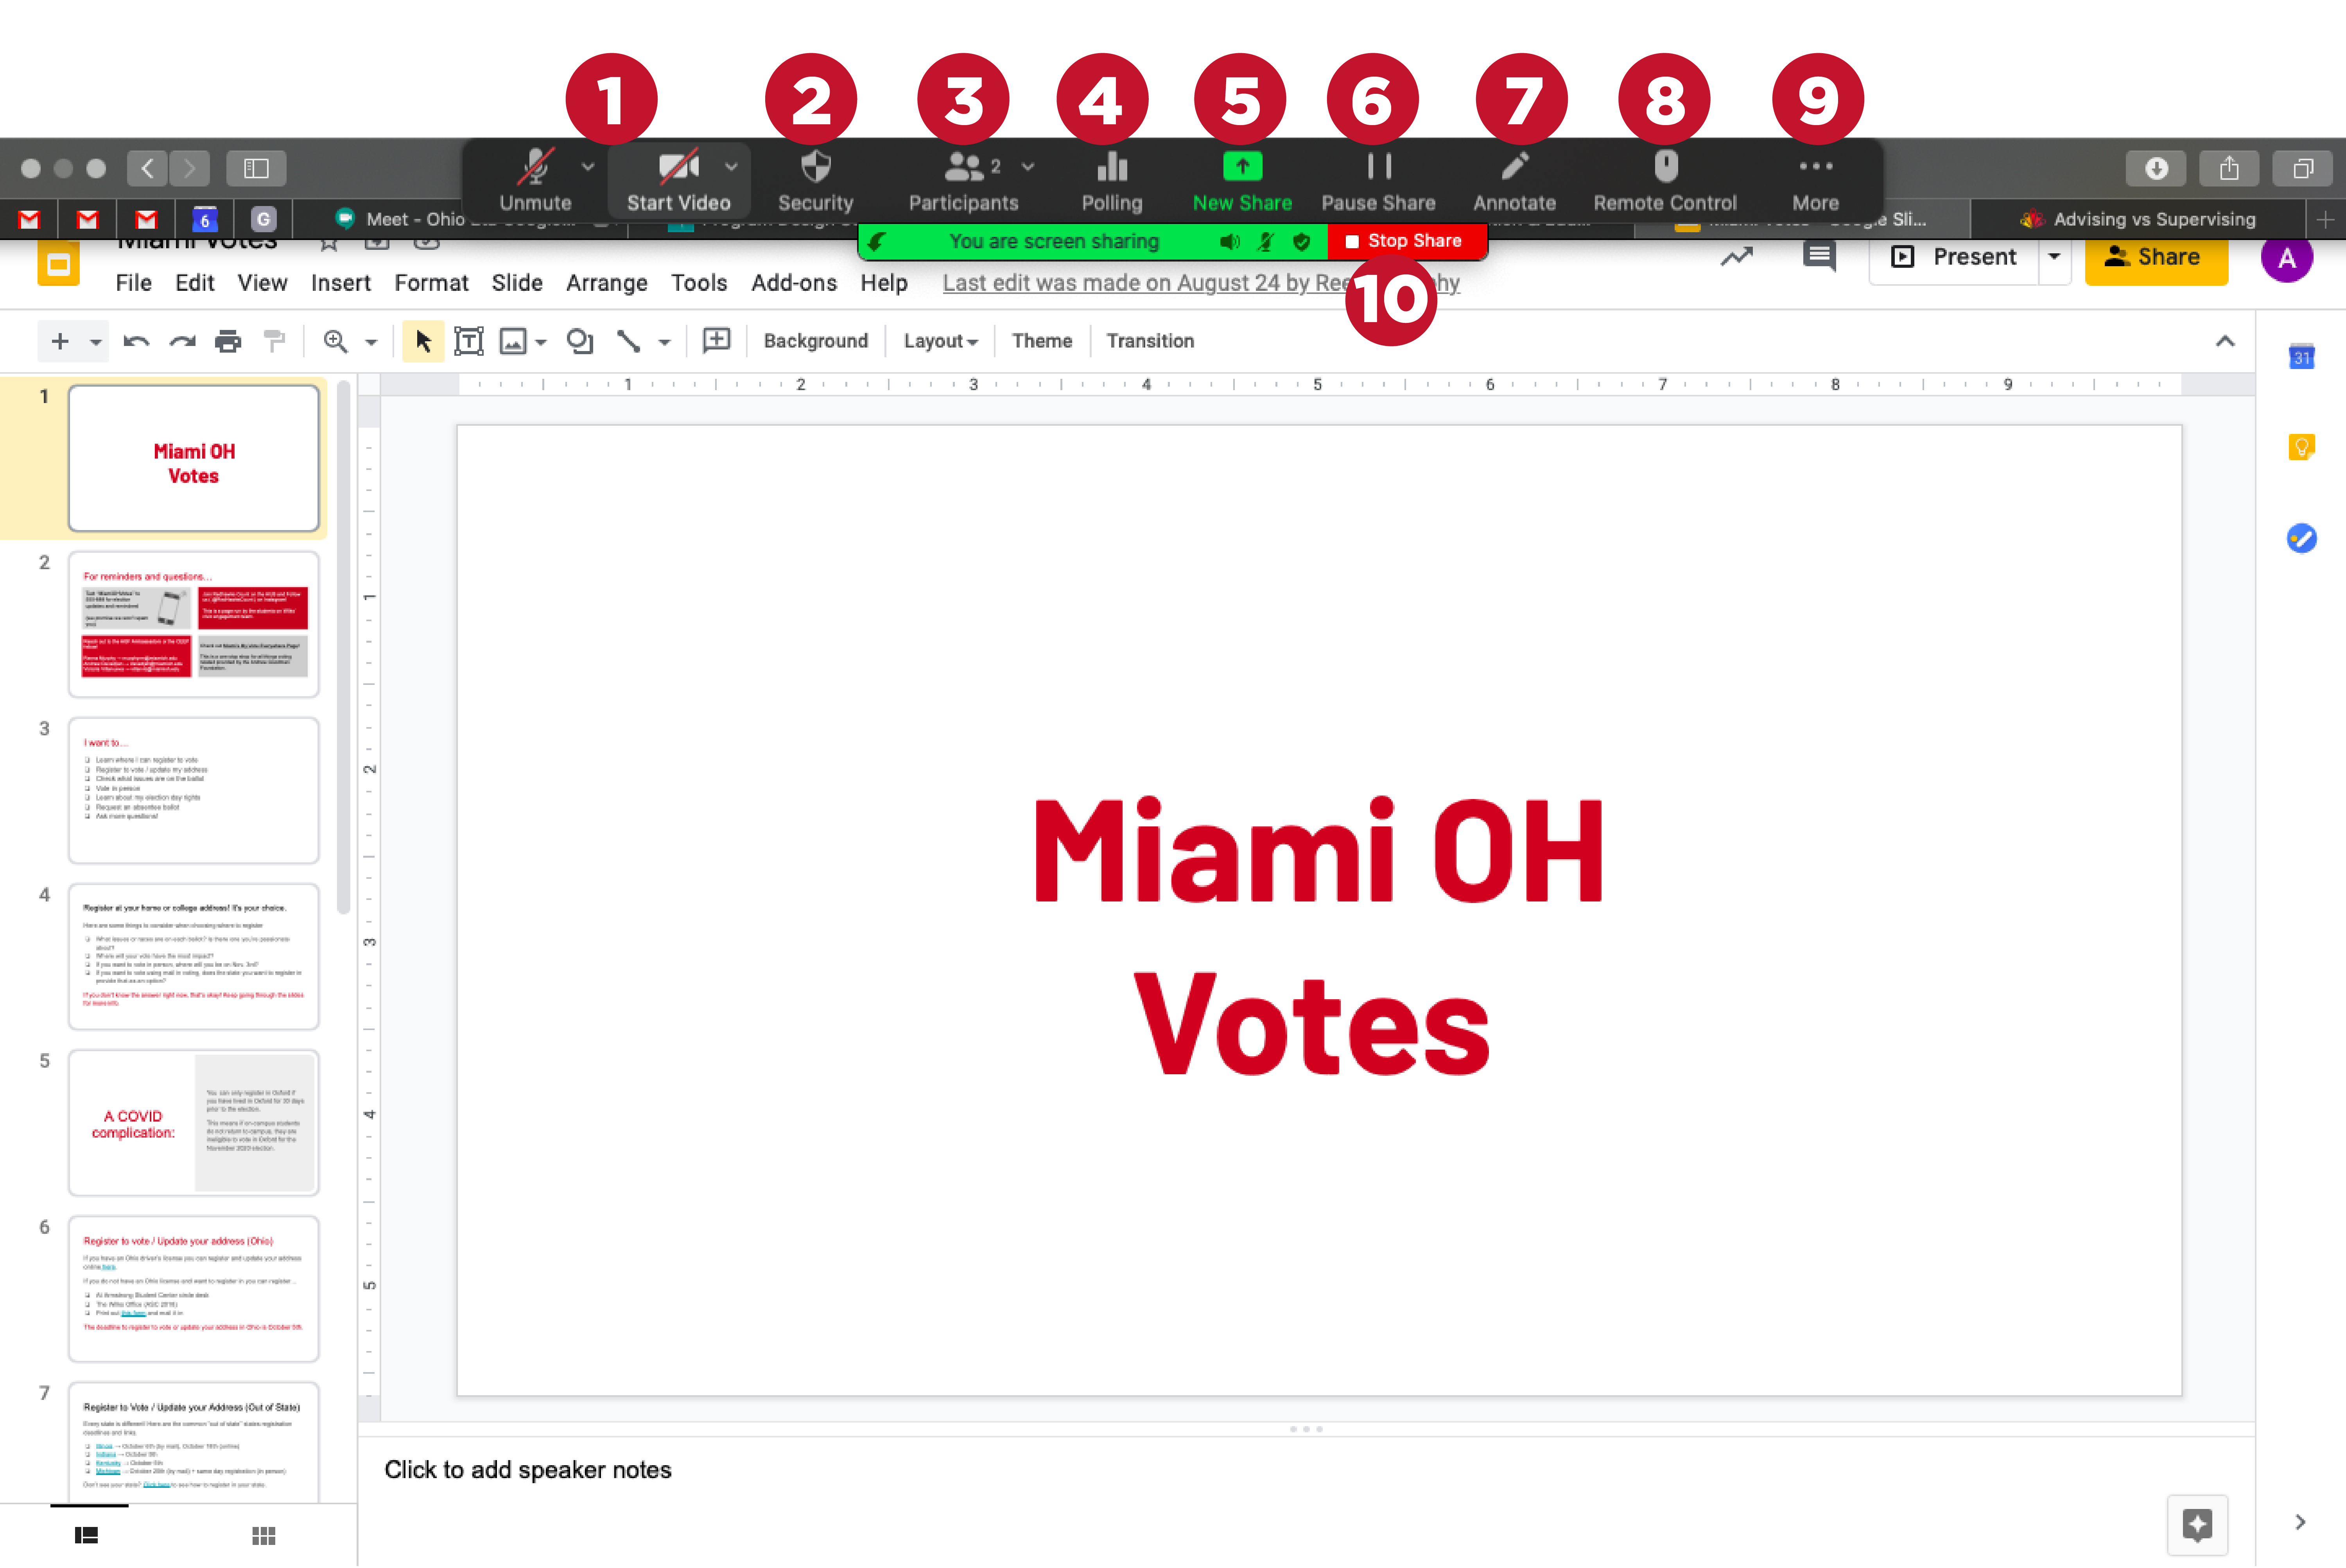
Presentation Controls
Once you’ve clicked Share, participants in Zoom will be able to see everything on your computer screen, so plan accordingly. You’ll see a green and red bar at the top. To stop sharing, click the red part of the bar. You also will have a number of other options available to you in the bar at the top of your screen.
- Mute/Unmute and Start/Stop Video - Clicking these buttons will allow you to mute or unmute yourself, and start or stop your video.
- Security - If your instructor gives you this option, you’ll be able to control aspects of your participants' experience, such as their ability to share their own screens or mute/unmute themselves.
- Participants - This button allows you to see who is in the session.
- Polling - If your instructor chooses to give you this option, you’ll be able to create polls for the participants during your presentation.
- New Share - This re-opens the previous pop up and allows you to choose the way you share your screen.
- Pause Share - This pauses your screen share.
- Annotate - This allows you to draw on your screen.
- Remote Control - Selecting this option allows you to give temporary access for a participant to control your mouse.
- More - This houses all of the other Zoom functions, including the chat and the record function.
- Stop Share - Once you complete your presentation, select this to end your screen share.